Tag: Europe

  • Brussels: An Honest First Look at Belgium’s Capital

    Brussels: An Honest First Look at Belgium’s Capital

    This post contains affiliate links. If you purchase through a link, I may earn a small commission at no extra cost to you. Full disclosure here.

    Brussels was our arrival city and the first of three Belgian stops — and I’ll be honest with you up front, it ended up being my least favorite of the three. That doesn’t mean skip it. It just means going in with the right expectations, which is exactly what I wish I’d had.

    Getting into the city

    Our arrival hit a snag at security. There were huge crowds, only a few lanes open, and none of the digital scanners were working — it took us about an hour and fifteen to get through. The silver lining: by the time we cleared it, our luggage was already waiting for us. Because we landed early with five people and a full set of bags, we skipped the train and took an Uber straight to the hotel. If you’re arriving as a group with luggage, that’s the call I’d make again — easier and far less stressful than wrangling everyone onto a train.

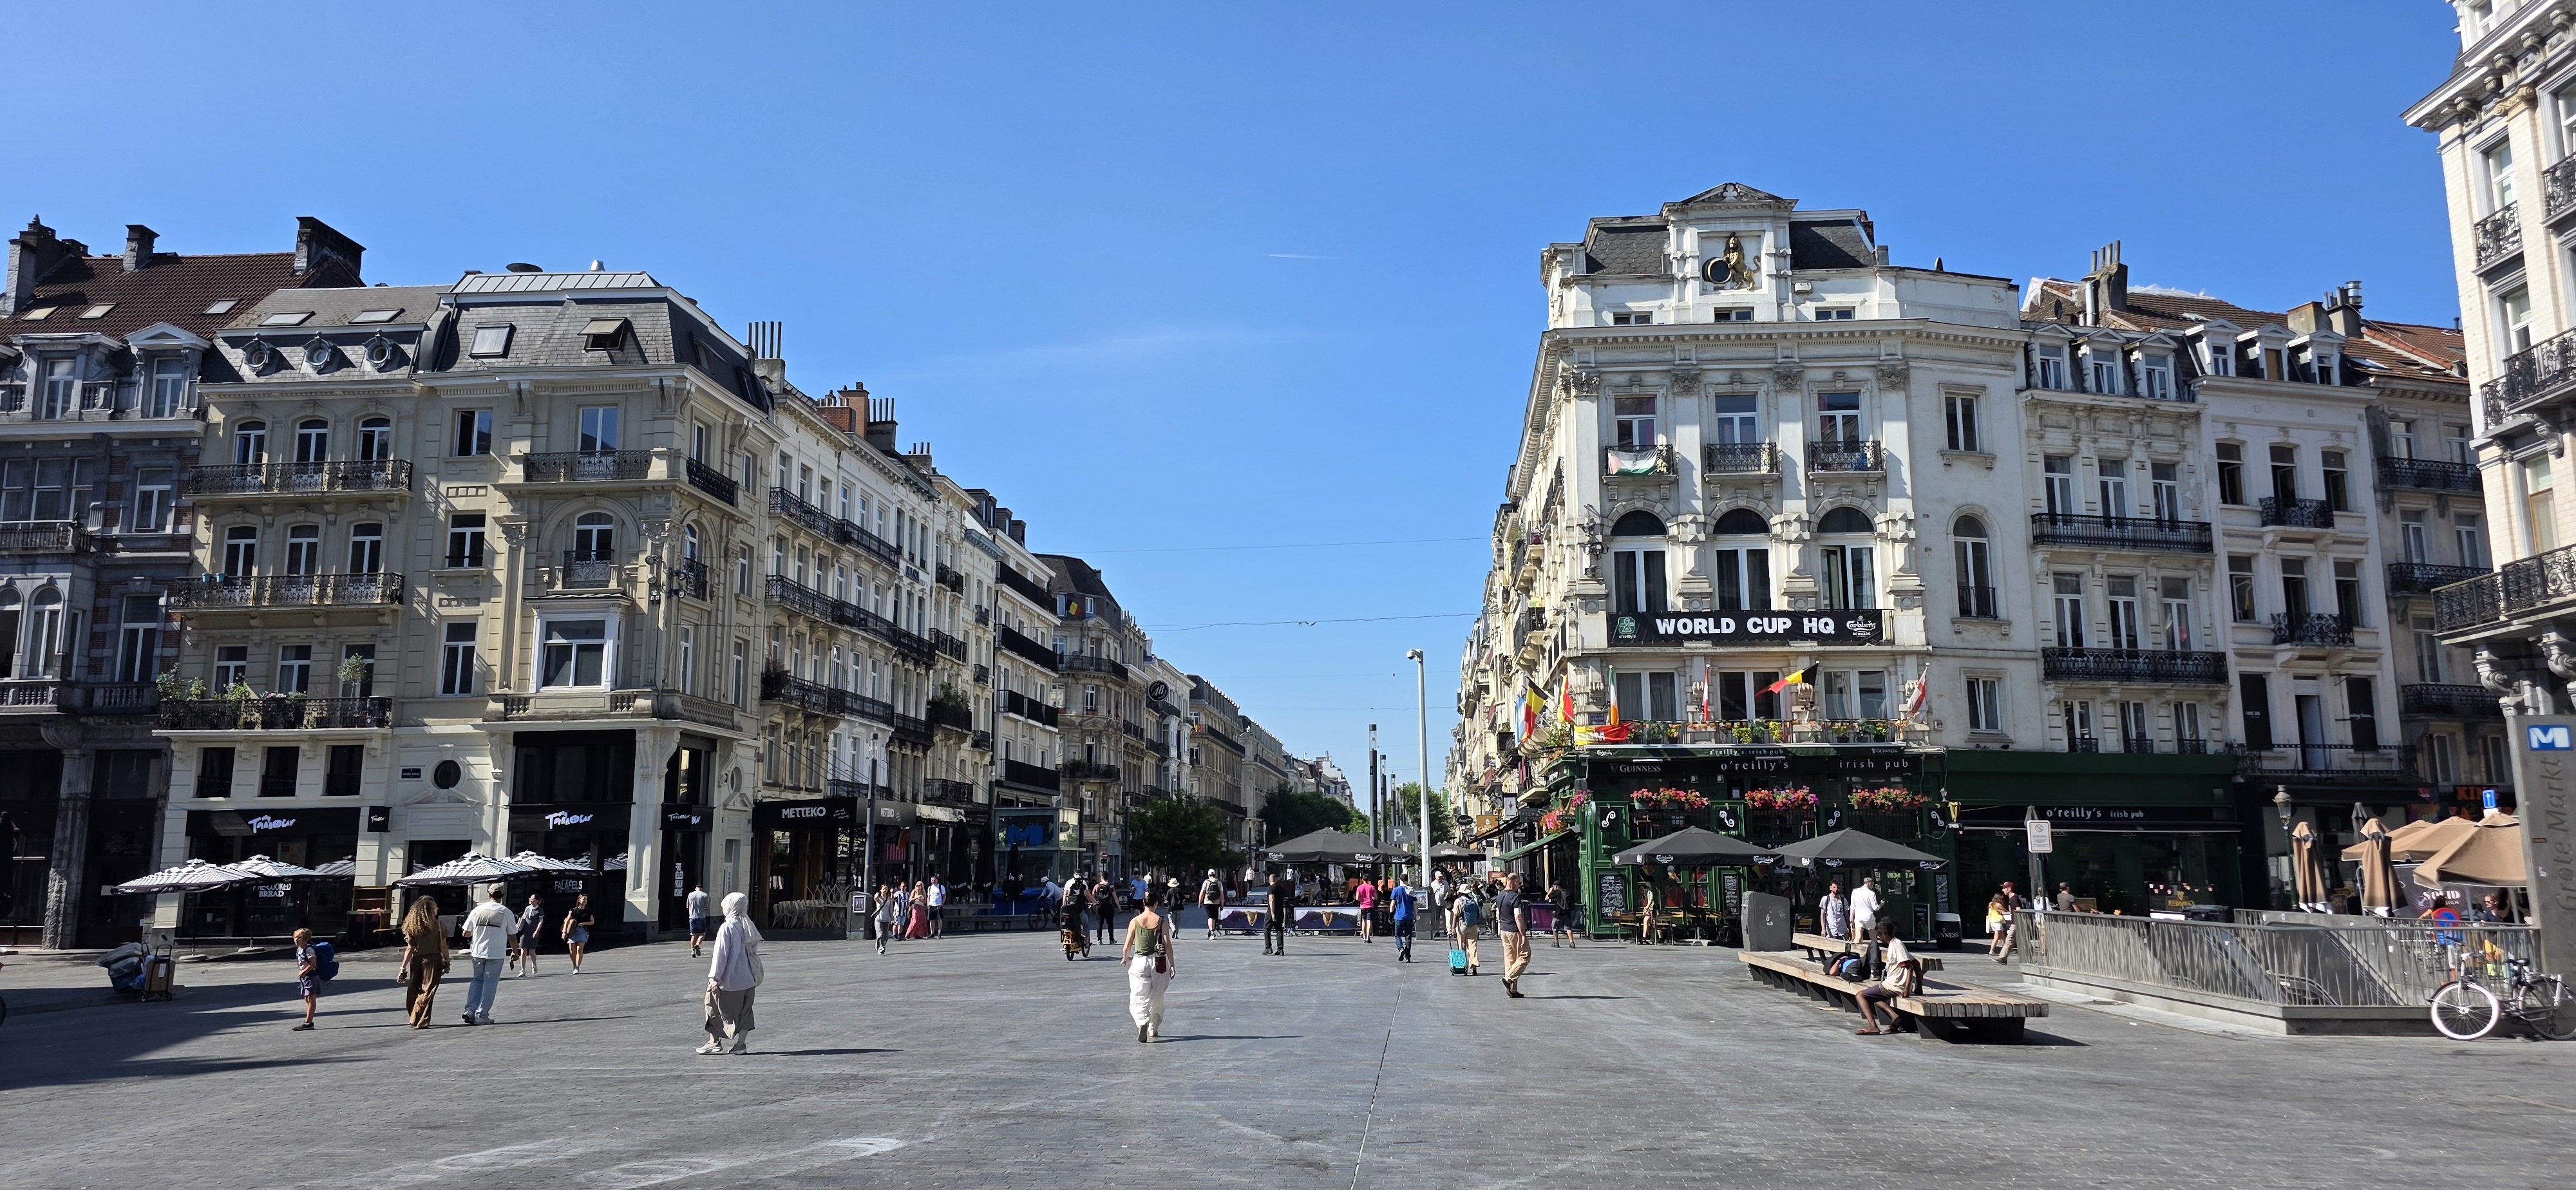
    Grand nineteenth-century buildings along a wide boulevard in central Brussels

    What we saw

    After dropping our bags, we wandered. The Grand-Place is genuinely show-stopping — the ornate guild houses and the Town Hall are worth the trip on their own. We also stopped by Manneken Pis, which is famous, tiny, and exactly as small as everyone warns you. It’s a fun tick-the-box moment more than a highlight.

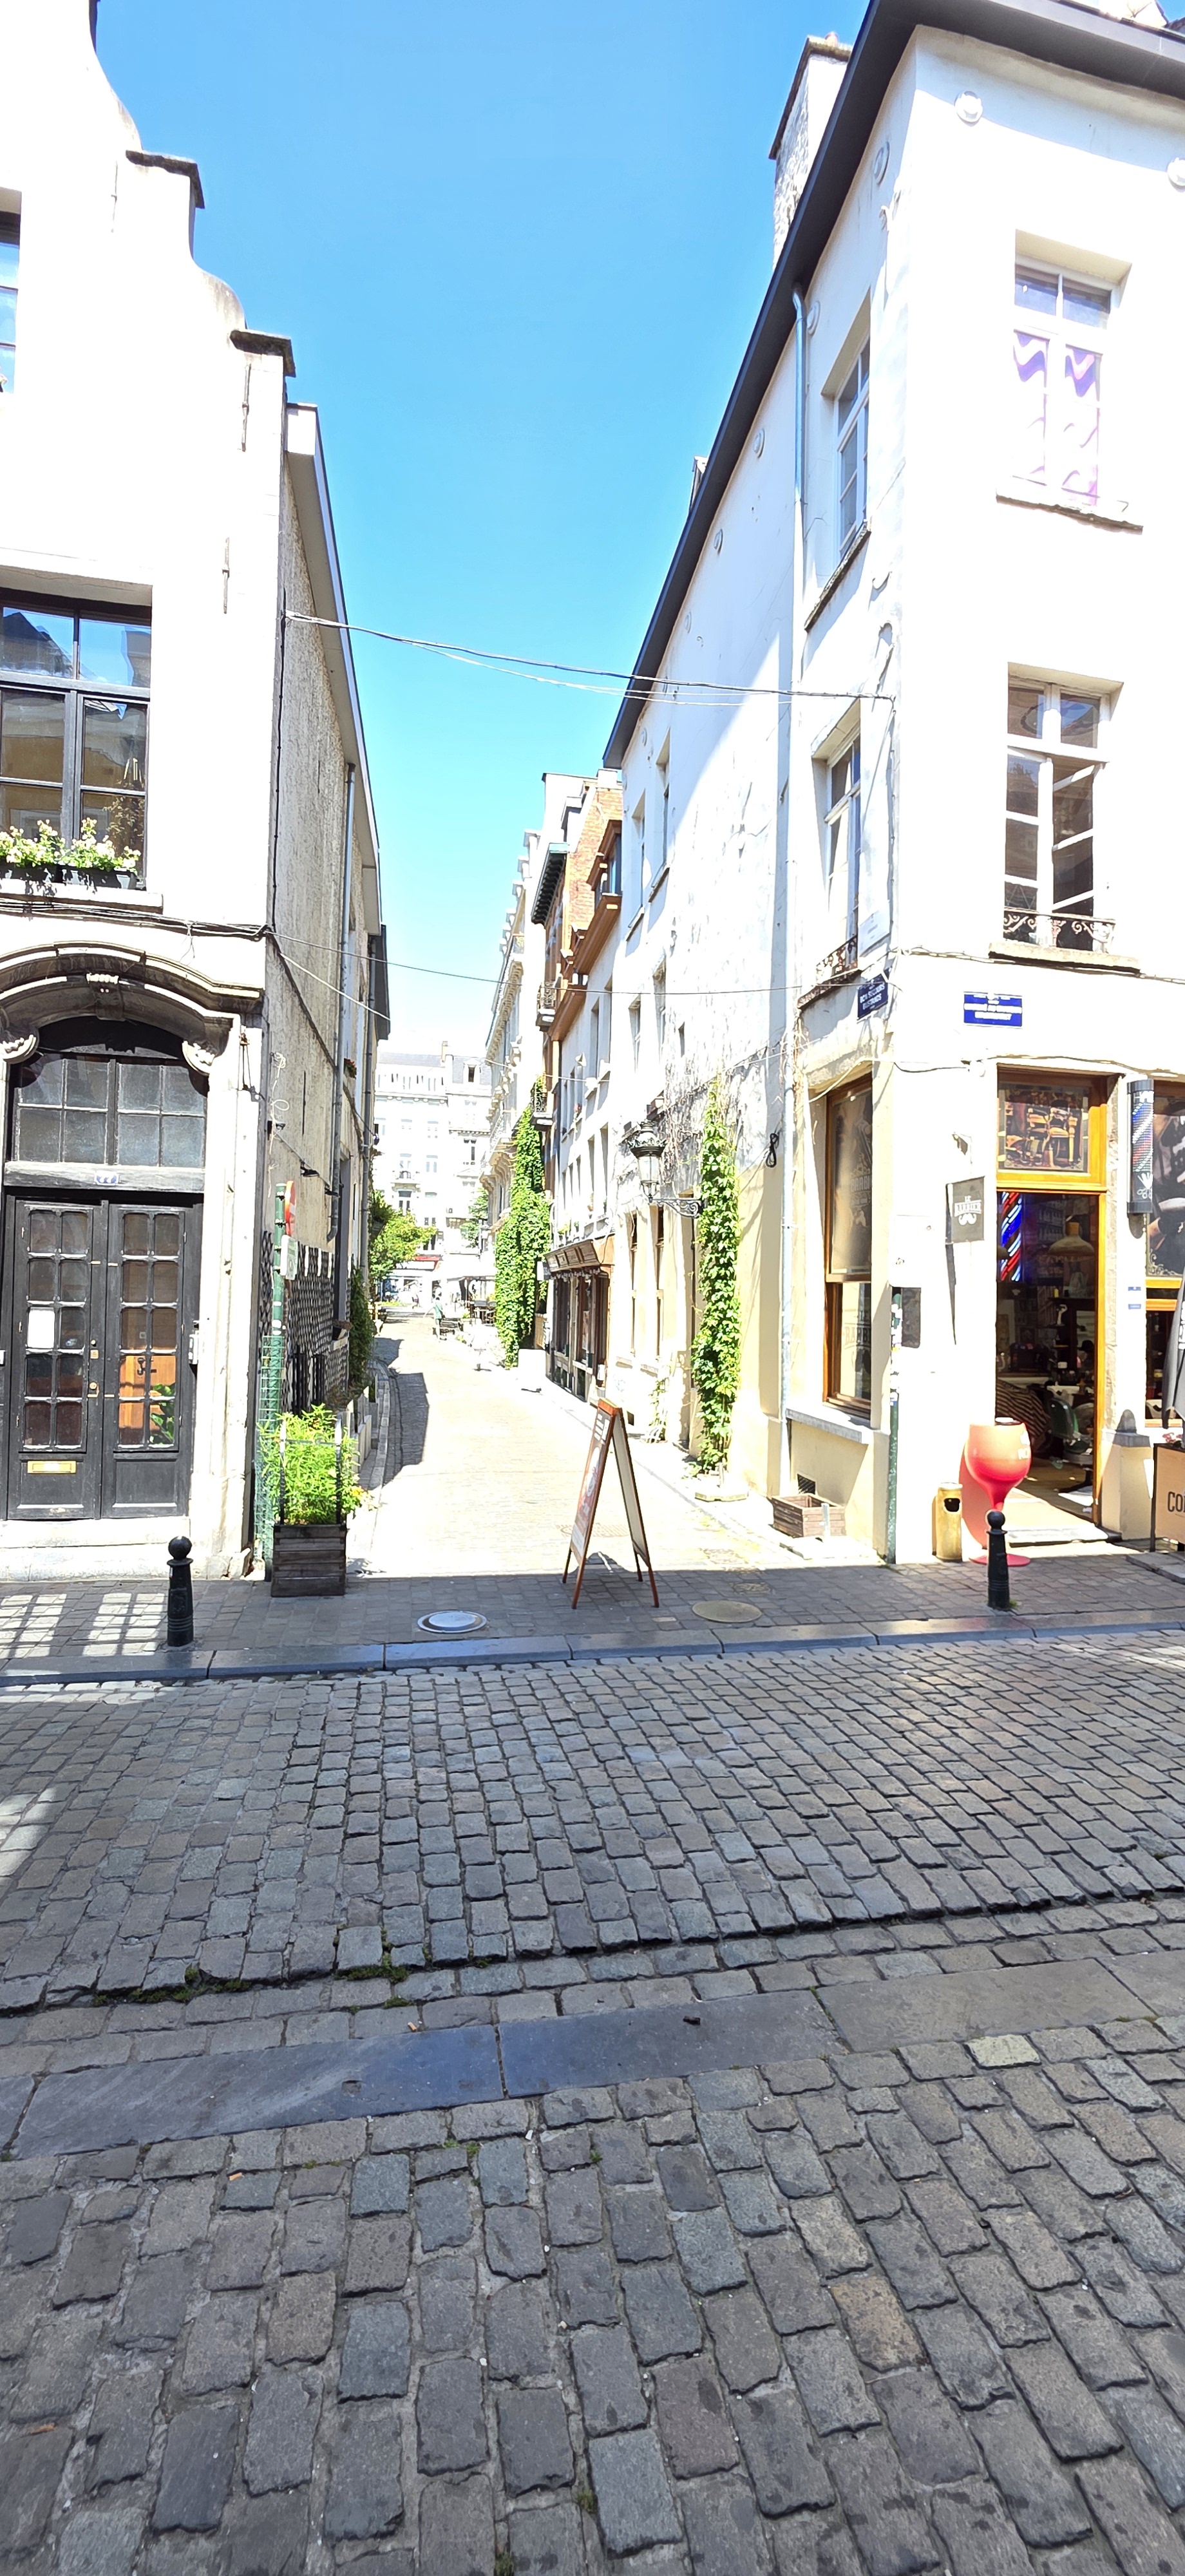
    Narrow street of shops and cafes in central Brussels on a bright summer day

    My honest take

    Brussels leans more touristy than Bruges or Ghent, with more of those souvenir-lined streets. A couple of times it didn’t feel especially safe — we were completely fine, but I stayed more aware of my bag than I did elsewhere. We also stayed near the beer museum, and on the weekend the plaza was a party well into the night. The next morning it was covered in trash with a few disgruntled stragglers still about. The cleanup crews were fast, but it wasn’t quite our pace.

    If I did it again, I’d book a hotel a few streets back from the main nightlife squares — you’re still walkable to everything, minus the 2 a.m. soundtrack.

    Is it worth it?

    Yes — for the Grand-Place alone, and as an easy base for day trips to Bruges and Ghent (both a quick, simple train ride away). Just go in knowing it’s the busiest and most touristy of the three, and plan your hotel accordingly.

    Comfort tip: in busier, touristy areas I like a crossbody bag that zips closed and sits in front of me — hands free for photos, and one less thing to think about. The one I carry is the Baggallini Securtex Anti-Theft Daytripper Sling. Honestly, anything by Baggallini does the job — and it’s well worth checking TJ Maxx before you pay full price.

    As an Amazon Associate, I earn from qualifying purchases. See my full Affiliate Disclosure for details.

  • How I Used AI to Help Plan Our Europe Trip (And What It Actually Produced)

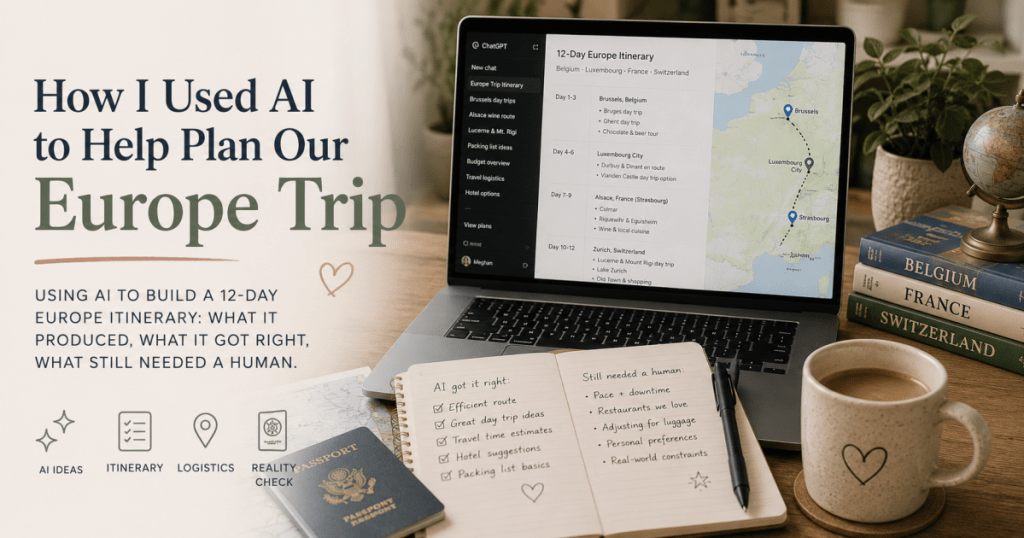
    How I Used AI to Help Plan Our Europe Trip (And What It Actually Produced)

    This post contains affiliate links. If you purchase through a link, I may earn a small commission at no extra cost to you. Full disclosure here.

    We’re taking this trip across four countries this July — five travelers, four hotels, three private drivers, a dozen trains, and more restaurant decisions than I want to count.

    I love trip planning. I find it genuinely fun. But even I hit a wall somewhere around the third time I was cross-referencing train schedules against hotel checkout times against driver pickup logistics. At that point I did something I hadn’t done before: I handed the whole thing to Claude and asked it to build me a document.

    What came back genuinely surprised me. Not because it was magic, but because it was actually useful — and the places where it wasn’t useful taught me something about what AI is and isn’t good at in travel planning.

    Here’s the honest breakdown.


    What I Asked It to Do

    I had already done the foundational research myself. I knew the destinations, I’d booked the hotels, I had confirmed flights and private drivers. What I didn’t have was a way to hold all of it together in one place that multiple people could actually use — not just a spreadsheet, but something that could live on a phone, work offline, and be printed and tabbed for travelers who prefer paper.

    So I gave Claude a detailed brief of everything I’d already decided and booked, and asked it to build a structured travel guide document. The prompt I used is at the bottom of this post — you can copy and use it directly.


    What It Actually Built

    The output was a comprehensive Word document with:

    A day-by-day itinerary for every day, each formatted the same way: a daily overview, an hour-by-hour schedule, a self-guided walking tour with numbered stops and addresses, a dining section broken down by meal, a reservations summary, placeholder boxes for QR codes and screenshots, and a “Good to Know” section covering photo spots, coffee stops, restroom locations, and rainy-day backups.

    City maps pages with placeholder spaces for printed maps plus clickable Google Maps links for every attraction and restaurant mentioned in the guide.

    A restaurant section organized by city and budget ($ to $$$) with specific recommendations and brief descriptions.

    A local foods guide for each country — what to order, what it is, where to find it.

    Five packing checklists: carry-on, checked bag, hotel checkout, international travel, and flight home.

    Budget trackers for daily spending, shared group expenses, cash, and credit card use.

    Emergency information for all four countries — emergency numbers, hospitals, and US embassy contacts.

    A master reservations log where all confirmation numbers could be filled in as they arrived.


    What It Got Right

    The structure was genuinely excellent. The idea of having every single day follow the same format — same sections, same order — is something I wouldn’t have done left to my own devices. I would have made some days more detailed and some less, depending on how much I knew about each place. Having the same bones every day means anyone can flip to any day and immediately know where to look for what they need.

    The walking tours were solid starting points. For cities I know less well, it gave me a logical route through the highlights with enough context to evaluate whether the order made sense. I adjusted some sequencing based on what I knew about the actual geography, but I didn’t have to start from scratch.

    The emergency information was something I would have put together eventually but almost certainly would have left incomplete. Having hospital names and embassy phone numbers for all four countries in one place, already formatted, was genuinely useful.

    The packing checklists were thorough without being ridiculous. The hotel checkout list in particular — chargers, the safe, under the bed — is the kind of thing that lives in your head until you’re in a cab to the airport wondering if you left something plugged in.


    What I Still Had to Do Myself

    Almost all of the actual research.

    The AI doesn’t know which restaurants are worth it right now. It can give you well-known names from its training data, but it can’t tell you which spots have declined, which are tourist traps that used to be good, or which new places have opened in the last year. For dining specifically, I still looked everything up on Google Maps and recent reviews before including anything.

    It also can’t book things. The private drivers, the brewery tour, the walking and tasting tour — all of that required finding vendors, emailing or calling, negotiating prices, and confirming details. AI built the slots in the document where that information would go. The actual information required me.

    The judgment calls about pacing were mine. The AI gave me an itinerary that looked complete on paper but needed real editing — accounting for different mobility levels in the group, that some travelers are not morning people, that Switzerland is genuinely expensive and we should build in more buffer time there. Those adjustments required knowing the people I was traveling with.

    The local tips — the things that make a guide feel like it was written by someone who’s actually been somewhere — came from my own research, reading other trip reports, and asking people who’d made the same route.


    When This Approach Works Best

    It works best when you’ve already done your research and made your decisions, and you need help organizing it all into something usable.

    It’s less useful at the research stage, where the quality of information matters more than the format. Start with the research yourself. Then use AI to help you build the container.


    The Prompt You Can Use

    Copy and paste this into Claude (or ChatGPT), fill in your details, and give it your confirmed bookings at the end. The more specific you are, the better the output.

    I'm planning a trip to [Destination 1], [Destination 2], [Destination 3], and [Destination 4]
    from [Start Date] to [End Date] with [Number of Travelers] travelers,
    flying from [Home Airport].
    
    Please create a comprehensive printable travel guide for me in a clean,
    structured format. The guide should work both printed and on a phone.
    
    Include these sections:
    
    COVER PAGE with destinations, dates, travelers, and flight route.
    
    TRIP AT A GLANCE with a route table (nights, city, hotel, country),
    flights summary, and a placeholder map box.
    
    HOTELS — one entry per hotel with address, phone, check-in/out dates,
    confirmation number blank, room notes, and Wi-Fi placeholder.
    
    TOURS & TRANSFERS — detailed entry for each booked tour or private driver,
    including pickup/drop-off, route, stops, payment, and driver name blank.
    
    DAILY ITINERARY — one section per day, each with:
    - Daily overview paragraph
    - Weather and transport line
    - Hour-by-hour schedule table
    - Self-guided walking tour with numbered stops (name, Google Maps link, description)
    - Dining by meal (coffee, lunch, treat, drinks, dinner)
    - Local foods to try that day
    - Reservations table for that day
    - QR/ticket placeholder boxes
    - Good to Know (photo spots, coffee stops, restrooms, rainy-day backup,
      packing reminder for tomorrow)
    - Notes lines
    
    CITY MAPS — one per city with placeholder map box, hotel/station links,
    bulleted attractions and restaurants.
    
    QR CODE VAULT — placeholder boxes for hotels, transport, tours, restaurants.
    
    RESTAURANT RECOMMENDATIONS — by city and budget ($ / $$ / $$$).
    
    LOCAL FOODS TO TRY — by country/region, with dish names and descriptions.
    
    TRANSPORTATION — airport transfers, train routes, tips, private driver table.
    
    PACKING CHECKLISTS — carry-on, checked bag, hotel checkout,
    international travel, flight home.
    
    BUDGET TRACKERS — daily spending, shared expenses, cash log, credit card log.
    
    EMERGENCY INFORMATION — emergency numbers, hospitals, embassy contacts,
    money/power/customs summary.
    
    RESERVATIONS & CONFIRMATIONS — master log tables for hotels, drivers,
    tours/tickets, and trains.
    
    NOTES — blank lines for journaling.
    
    Here are my confirmed bookings:
    
    Flights:
    - [Outbound: Date, Airline, Flight #, Route, Departure time, Arrival time]
    - [Return: Date, Airline, Flight #, Route, Departure time, Arrival time]
    
    Hotels:
    - [Hotel Name, City, Dates, Full address, Phone number]
    - [Hotel Name, City, Dates, Full address, Phone number]
    - (continue for each hotel)
    
    Confirmed tours and transfers:
    - [Date: What, time, price, payment method, any stops]
    - [Date: What, time, price, payment method, any stops]
    - (continue for each booking)
    
    Any other confirmed items:
    - [Description, date, details]
    
    Please format every walking tour stop with a Google Maps link using:
    https://www.google.com/maps/search/?api=1&query=%5Bencoded+place+name%5D
    
    Make the structure identical for every day so it’s easy to navigate
    both in print and on a phone.

    A few things to check before you use the output: verify all restaurant recommendations are current (AI training data gets stale), double-check train schedules and prices on the actual rail website, and fill in the blanks that only you can fill in — confirmation numbers, driver names, your actual preferences on pace and how much walking the group can handle.

    The AI builds the container. You fill it with the real trip.


    One More Thing: Document It While You’re There

    The planning gets you to the trip. The journal brings it home with you.

    Every travel journal I picked up over the years assumed I wanted to schedule my days down to the minute and tick off a list of sights. That’s never been how I travel. So I made one that isn’t like that. Cozy Travels is a comfort-first travel journal with a pace tracker on every page, a Comfort Find of the Day prompt, and room for the slow moments that don’t make it onto any itinerary. It’s the journal I wished I’d had on every trip I’ve taken.

    → See Cozy Travels on Amazon


    As an Amazon Associate, I earn from qualifying purchases. See my full Affiliate Disclosure for details.
  • What I’m Packing for 12 Days in Europe: Carry-On Only

    What I’m Packing for 12 Days in Europe: Carry-On Only

    This post contains affiliate links. If you purchase through a link, I may earn a small commission at no extra cost to you. Full disclosure here. Updated post-trip with what I actually packed, what worked, and the one packing curveball I did not see coming.

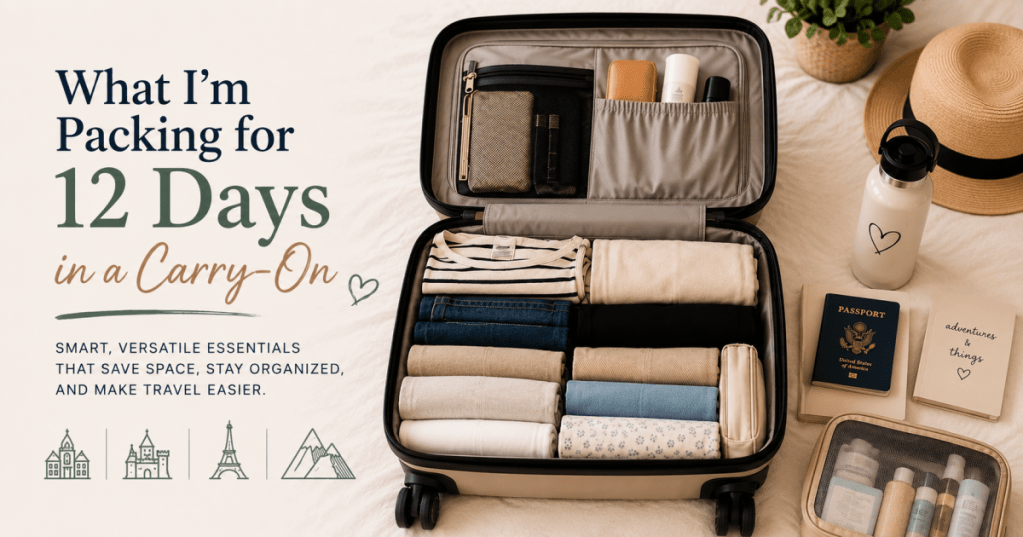
    Here’s what I did: twelve days across five countries, with a carry-on suitcase only.

    Belgium. Luxembourg. Germany. France. Switzerland. One bag. No checked luggage, no checked fees, no waiting at baggage claim after an overnight transatlantic flight when I landed in the morning and desperately wanted to get to the hotel and lie down.

    I’ve been working toward carry-on only travel for a while now. The packing cubes made it feel possible. The right bag made it feel achievable. This trip was the real test: longer than I’d done carry-on before, more weather variability than a short weekend, and enough moving between cities that I couldn’t afford to be dragging an overweight bag through cobblestone streets in July heat.

    This is what I actually packed, why it earned its spot, and what I left at home on purpose — plus the one packing curveball I didn’t see coming. Full post-trip verdict below.


    🗺️ The Trip

    Twelve days, five countries, all in summer — a mix of big cities, small towns, and one mountain day, moving every few days rather than living out of a suitcase in one spot. That pacing helps a lot with carry-on only, because you’re not fully unpacking and repacking at every stop.

    The full day-by-day itinerary — where we went, in what order, and how we got between stops — is getting its own post. This one’s just about what went in the bag.


    🎒 The Bag Situation

    I ended up sticking with the same BAGSMART 35L Travel Backpack I used for Oregon, instead of upgrading to something new — and I’m glad I did. It held everything I needed for twelve days across five countries, the pockets made grabbing quick-need items (passport, phone, chargers) genuinely easy, and it was simple to manage moving between cities. It did get a little warm against my back at one point, but nothing dramatic — and I run hot regardless of what I’m wearing, so I wouldn’t hold that against the bag.

    Confession: I packed everything to true carry-on spec — I confirmed it all fit in my actual carry-on before I left. But two weeks before the trip, that carry-on cracked from years of use, and I didn’t have time to find a replacement I loved (I’ve got my eye on a Samsonite for next time). So I traveled with a bag one size up, out of necessity, not choice. Everything on this list still fits in a genuine carry-on — I checked.

    Inside the bag: the same BAGSMART Compression Packing Cubes I’ve used on every trip since I found them. Compression cubes are genuinely the single biggest reason carry-on only was achievable for a trip this long — not because they create space from nothing, but because they forced me to be intentional about what went in, and they kept everything from becoming one large tangled pile. The BAGSMART Large Hanging Toiletry Bag handled everything in the bathroom, hung from any hook, and meant I never had a shampoo bottle loose in my bag.


    👚 What I Actually Packed

    July in this part of Europe was warm — high 70s to low 80s — with enough afternoon rain that waterproofing mattered. The activities were almost entirely city walking, which meant cobblestones, uneven surfaces, and a lot of standing. One mountain (Rigi), which added a layer consideration for elevation. No beach. No formal events.

    Clothing

    Here’s the actual list, no rounding down: 4 pairs of shorts, 1 long skirt, 1 short skirt, 2 pairs of flowy pants (black and tan), 6 t-shirts (2 black, 2 white, 1 grey, 1 maroon), 1 tank top, 4 bras, 6 pairs of socks, 1 pair of pajamas, and 14 pairs of underwear — yes, fourteen. We do what we must. I did one load of laundry mid-trip, Tide packets in the sink, mainly to refresh the t-shirts.

    All of that still left room on the way back for souvenirs — I bought two shirts and packed them straight into the backpack — plus my French pharmacy haul (its own post, coming soon) and a stash of chocolate. Everything fit without a fight.

    Shoes

    Shoes are the hardest part of packing for Europe, and the cobblestone streets will destroy anything without proper support. I packed two pairs, as planned — but not quite the pairs I expected. My Skechers GO Walk Flex sandals ended up doing more work than my sneakers; they were more comfortable for the sheer amount of walking, and the sneakers mostly came out on cooler days or the mountain hike. Worth remembering for next time: pack the shoe you’ll actually reach for, not just the one that photographs best.

    I wore one pair on the plane to save space, as planned. Still non-negotiable with carry-on only travel.

    Day Bag

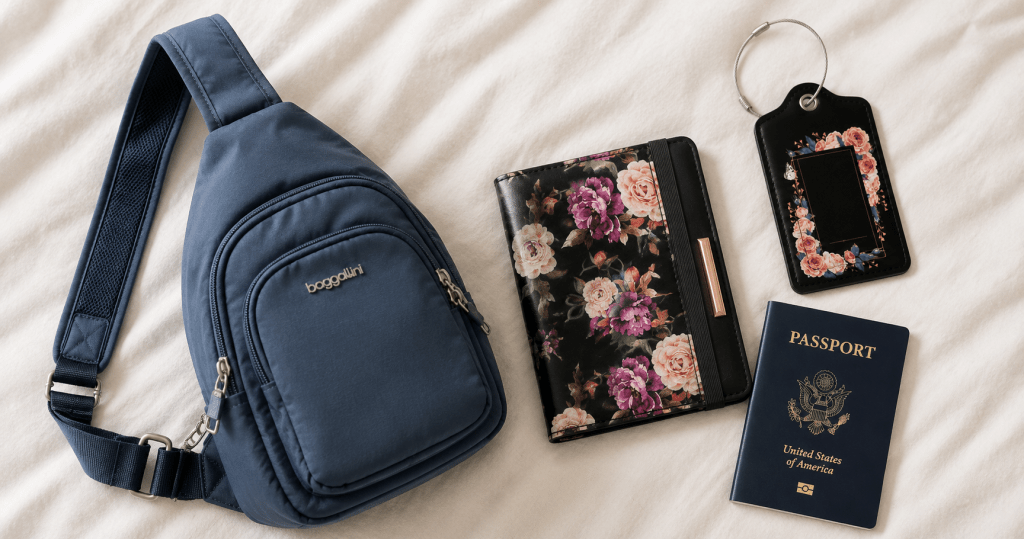
    The Baggallini Securtex Anti-Theft Daytripper Sling came everywhere as my day-use bag — same as it did in Seattle. It held what I actually needed for a day of city walking: phone, wallet, passport holder, earbuds, lip balm, one snack. Didn’t require thinking about. Didn’t pull on one shoulder. Fit under a seat on a train without blocking the aisle.

    Rain

    The SY COMPACT Travel Umbrella came along, and it earned its space — European summer weather was genuinely unpredictable, and I wasn’t caught out without one this time.


    🛩️ The Flight Kit

    Transatlantic overnight flight. I do not sleep well on planes. I wore a sweater, a t-shirt, and joggers for the flight over — comfortable enough to sleep in, and easy to wash and re-wear for the flight home. Here’s what else was in my personal item for the flight specifically:


    📊 Documents + Security

    Baggallini anti-theft sling bag, floral RFID passport holder, luggage tag, and US passport laid out on a bed

    Five countries meant five opportunities to need my passport in a hurry. Everything document-related traveled in the Coco Rossi RFID Passport Holder, which fit into the Baggallini sling and meant I always knew exactly where it was. Anikathy Luggage Tags on the bag, Life360 Tile Slim inside it. The bag never got lost — carry-on only makes that substantially less likely — but I would have had a way to find it.


    📝 What I Actually Left at Home

    This is the part of carry-on only packing that nobody talks about honestly enough — and all of it held up.

    • The “just in case” outfit. I packed for the trip I was taking, not for an imaginary nicer version of it. No specific occasion on the itinerary meant no outfit for it — and I didn’t miss it once.
    • Full-size anything. Every toiletry was travel-size or solid-form. The hanging toiletry bag never got heavy enough to strain the hook.
    • The second pair of pajamas. One set was genuinely enough — I shower before bed, so I never needed a backup. Though in hindsight, I could have fit a second pair, or done a laundry run first thing in the morning if I’d wanted the option.
    • Books. Kindle app exists. I didn’t carry three paperbacks across Switzerland just in case I wanted options.
    • Anything I could buy there. Forgot something? If it cost less than the airline’s checked bag fee, I bought it at a pharmacy instead — more on that haul soon.

    ✅ The Verdict

    Carry-on only worked — even with a last-minute bag swap I didn’t plan for. Everything on this list fit, nothing felt like a sacrifice, and the one hiccup (RIP, old carry-on) turned into a lesson for next time rather than a disaster. The full day-by-day breakdown of where we went is coming in its own post.


    Related Reading

    As an Amazon Associate, I earn from qualifying purchases. See my full Affiliate Disclosure for details.
  • Scotland Trip Guide: What to Pack, What to Book, and What I Wish I’d Known

    Scotland Trip Guide: What to Pack, What to Book, and What I Wish I’d Known

    This post contains affiliate links. If you purchase through a link, I may earn a small commission at no extra cost to you. Full disclosure here.

    Scotland was one of those trips that surprised me in ways I didn’t expect.

    I knew it would be beautiful. I knew the weather would be unpredictable. I did not anticipate how much I would love it, how much the right gear would matter, or how the black cab day trips from Edinburgh would become the highlight of the entire experience.

    This guide is what I wish I’d had before I went — practical, honest, and built around comfort-first travel for someone who wants to actually enjoy the trip rather than just survive it.

    Edinburgh Castle viewed dramatically from below, perched on volcanic rock with green trees in the foreground
    Edinburgh Castle — one of the most dramatic approaches you’ll see anywhere in Europe.

    Edinburgh: The Perfect Base

    I stayed in Edinburgh for the duration of my trip and used it as a base for all my day trips. This turned out to be exactly the right call. Edinburgh itself is beautiful and very walkable — the Old Town and Royal Mile are full of things to explore on foot, including some unexpected gems.

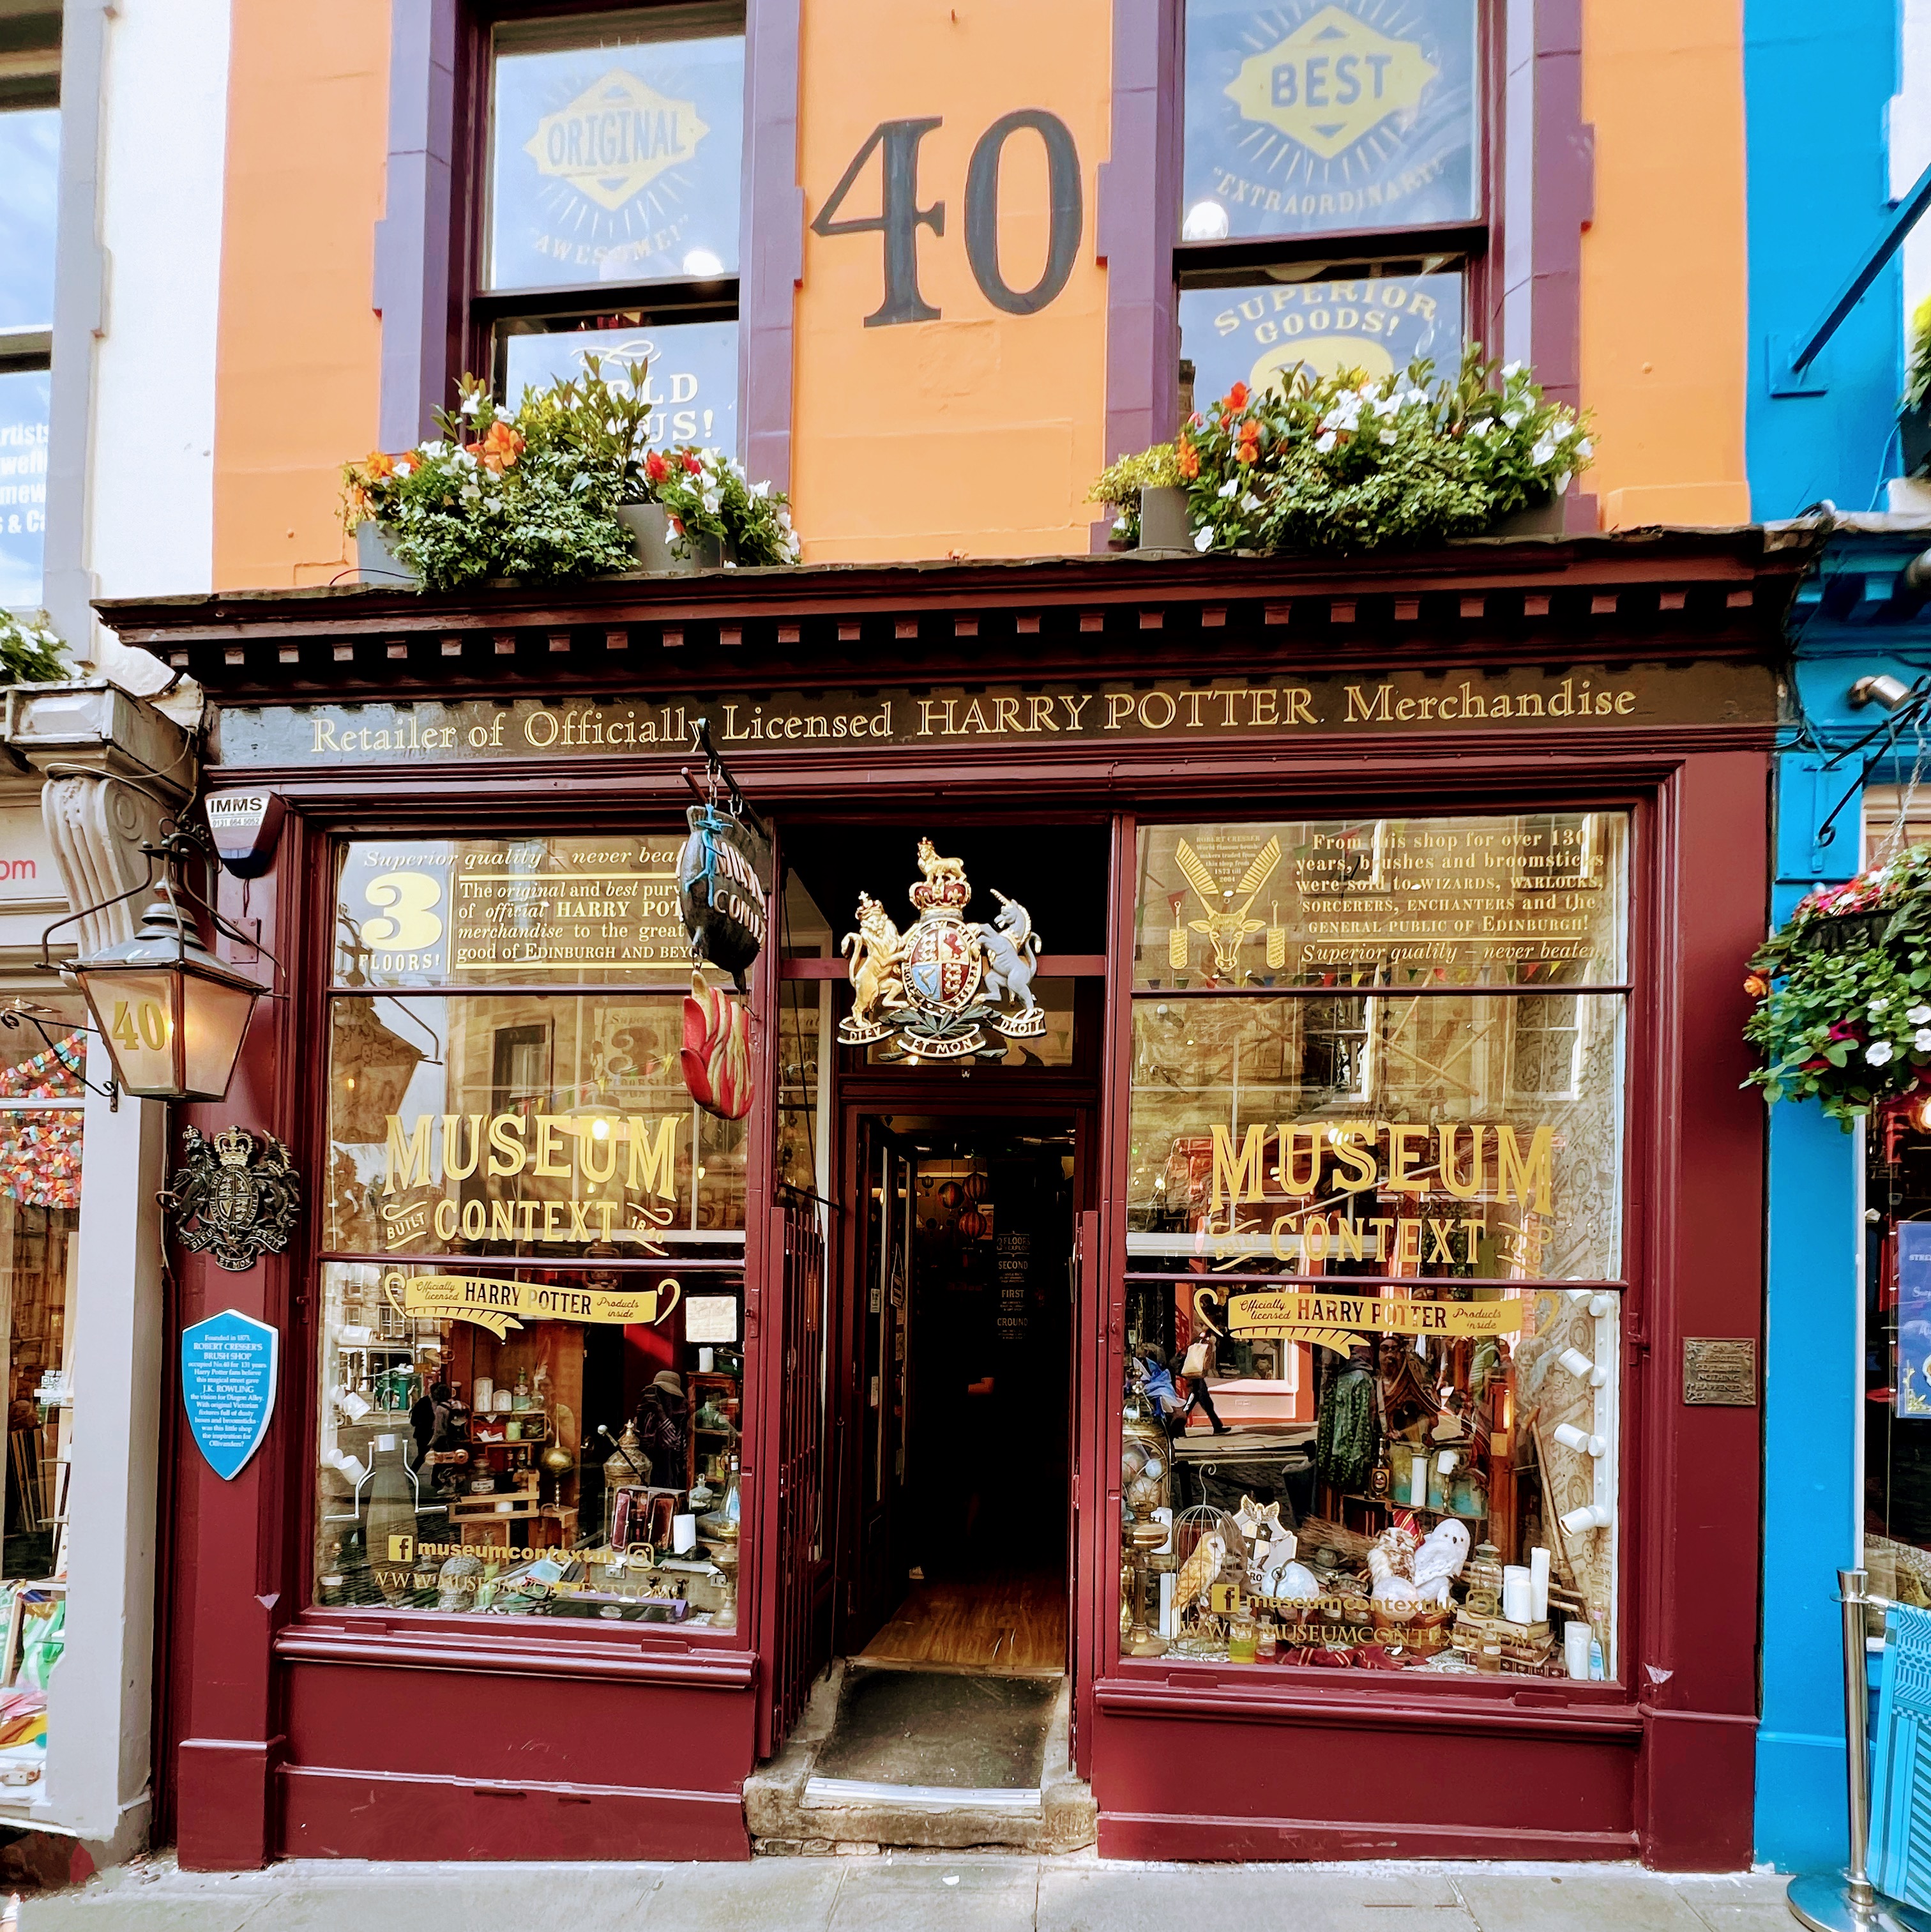
    The city’s Harry Potter connections alone are worth a morning. Edinburgh’s streets and alleyways were part of what inspired J.K. Rowling when she was writing the series, and you can feel it walking around. The officially licensed Harry Potter shop on the Royal Mile is worth a visit — three floors of merchandise in a genuinely atmospheric old building.

    Museum Context Harry Potter shop on the Royal Mile in Edinburgh, with ornate dark wood shopfront and flower boxes
    The officially licensed Harry Potter shop on the Royal Mile — three floors and genuinely worth the stop.

    I also did an islander bag-making experience while in Edinburgh, which I’d recommend to anyone who likes crafts or wants a break from sightseeing. It was a fun, cozy afternoon and a nice contrast to the outdoor day trips.


    The Day Trips: Black Cab Tours Are the Answer

    I cannot recommend Edinburgh Tour Guides enough. These are black cab drivers who are also licensed tour guides, and the combination makes for day trips that are genuinely excellent — comfortable, informative, flexible, and nothing like a generic coach tour.

    You’re in a proper black cab with a driver who knows the history, knows the roads, and can take you to places a big bus simply can’t reach. They can adjust the route based on weather or what you’re most interested in. I booked all my day trips through them and every single one was worth it.

    📍 Edinburgh Tour Guides — I highly recommend booking through them

    Day 1: Stirling (9am Pickup)

    Stirling is one of Scotland’s most historically significant cities, home to Stirling Castle and the Wallace Monument. It’s about an hour from Edinburgh by road. A 9am pickup gets you there early before the crowds build, which makes a real difference at the castle. This tour is great if you want a solid mix of history and scenery without covering too much ground in one day.

    Day 2: Loch Ness + Glenfinnan Viaduct (8am Pickup)

    This was the longest day and genuinely one of my favorites. An 8am pickup is important here — you’re covering a lot of ground and you want the maximum time at each stop.

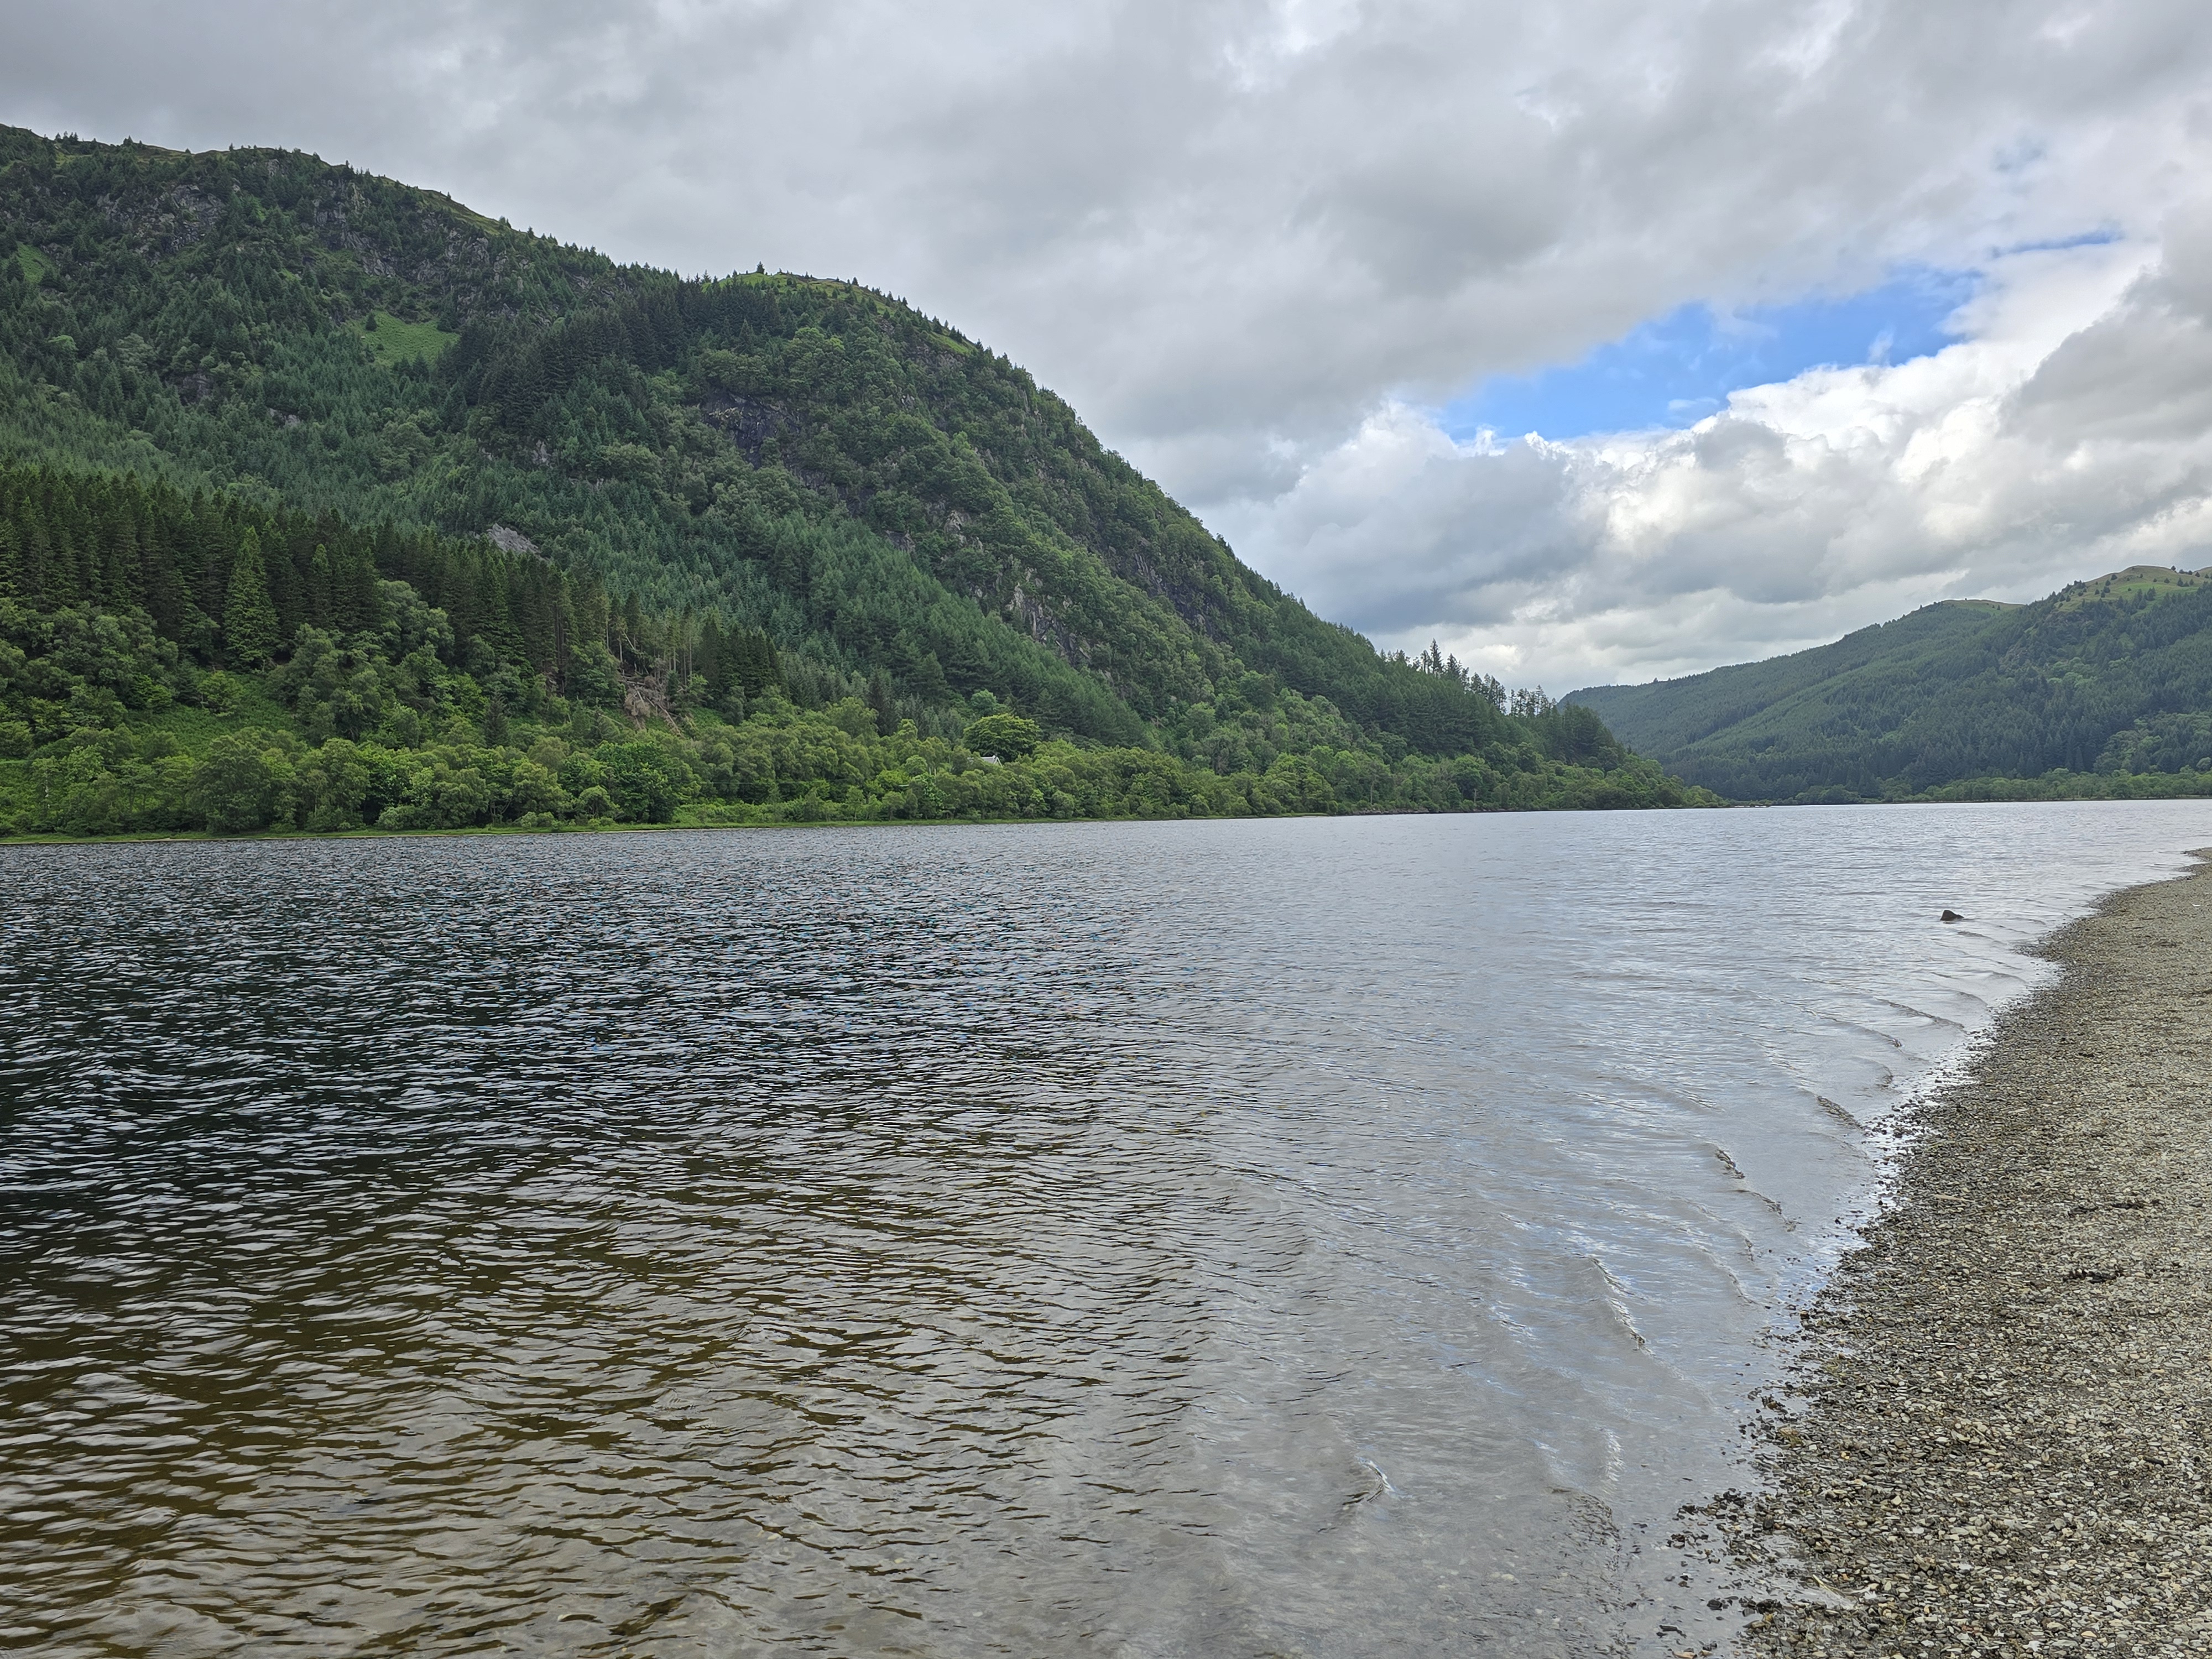
    Loch Ness is as atmospheric as you’d expect. The water is dark and the hills come down right to the edge — it feels ancient in a way that photos don’t quite capture.

    Still dark water of a Scottish loch with green forested hills rolling down to the shore under a partly cloudy sky
    The loch — darker and more dramatic in person than any photo I’ve seen.

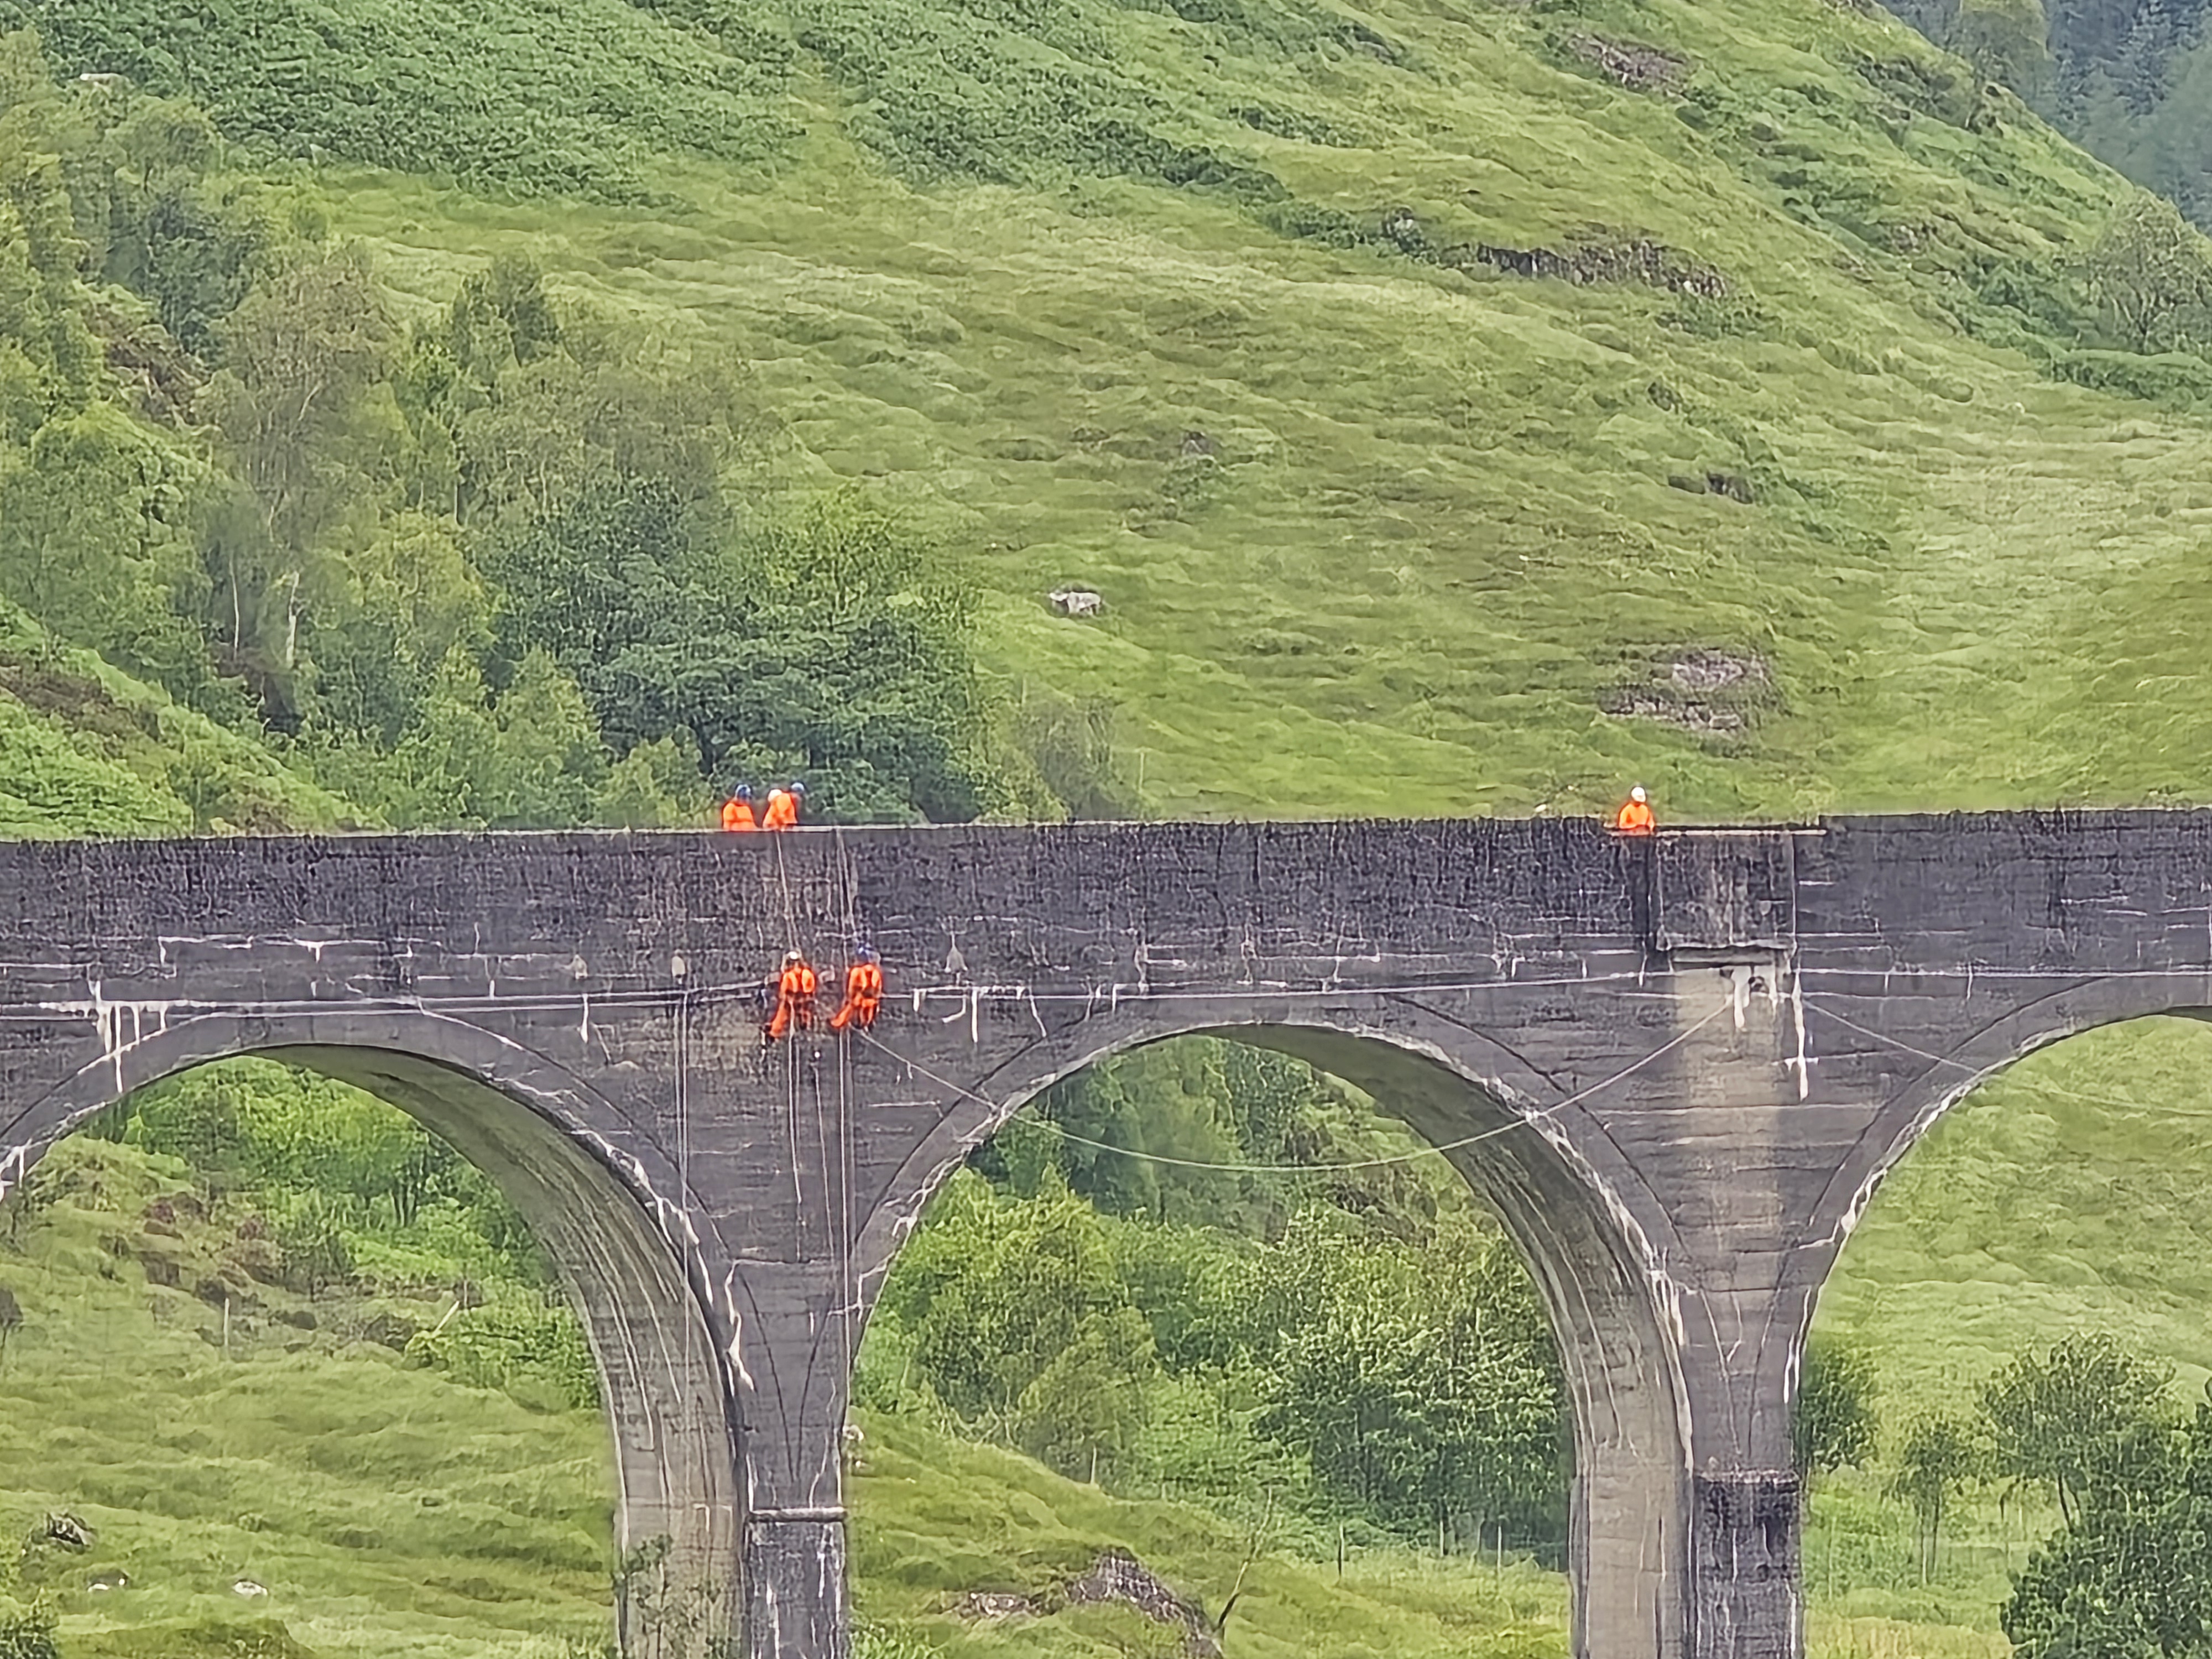
    The Glenfinnan Viaduct stop is a must, especially for Harry Potter fans. This is the bridge the Hogwarts Express crosses in the films, and it’s genuinely beautiful in person. When we arrived, the maintenance crew was working on the viaduct — workers in orange suspended on the stone arches. It was one of those authentically unscripted travel moments that you can’t plan for and that makes a trip feel real.

    Glenfinnan Viaduct with maintenance workers in orange high-visibility vests working on the stone arches, surrounded by lush green Scottish hills
    The Glenfinnan Viaduct — normally you see it with a steam train. We got the maintenance crew instead. Still spectacular.

    Day 3: The Highland Experience — Glengoyne, Loch Lomond, Glen Coe + Hagrid’s Hut

    This tour covers a lot of ground and every stop is worth it. Glengoyne Distillery offers a 10:30am tour that’s genuinely interesting even if whisky isn’t your thing — the setting alone, with the hills right behind the distillery, is worth stopping for.

    Loch Lomond was stunning — calmer and more accessible than Loch Ness, with an easier shoreline walk. The Drover’s Inn is a historic pub stop with a character that takes some people by surprise (taxidermy everywhere, but very atmospheric). And Glen Coe is dramatic in a way that’s hard to describe — the scale of the valley is genuinely breathtaking.

    The location used for Hagrid’s Hut in the Harry Potter films is in this area — a highlight for fans and worth the stop even if you’re not.


    🌧️ What to Pack for Scotland

    Scotland’s weather is genuinely unpredictable. It rained on multiple days, was beautiful on others, and shifted significantly within the same day. The gear you bring either solves this problem or it doesn’t — there’s no middle ground.

    Waterproof Footwear — Non-Negotiable

    I wore my Sperry Women’s Saltwater Duck Boots on every outdoor day and I’m very glad I did. These are genuinely waterproof (not water resistant — actually waterproof), comfortable for a full day of walking, and stable on wet cobblestone. If you’re going to Scotland, you need waterproof boots. These are mine.

    I also brought a pair of walking shoes with a good grip for cobblestone — something supportive with a non-slip sole. The Old Town streets in Edinburgh are beautiful but uneven, and the wrong shoe will end your day early.

    Rain Jacket — Also Non-Negotiable

    A packable, waterproof rain jacket is essential. Not a water-resistant shell — a real rain jacket. Scotland will test it. I’d suggest one you can layer over a sweater because the temperature shifts too, and you’ll want that flexibility throughout the day.

    Travel Umbrella

    The SY COMPACT Travel Umbrella came with me and it earns its space. Windproof, compact, and actually reliable. In Scotland specifically, you want one that handles wind without turning inside out — this one does.

    Packing System

    I used the BAGSMART Compression Packing Cubes and the BAGSMART Large Hanging Toiletry Bag for Scotland, same as every other trip. The toiletry bag is especially useful in Scottish B&Bs and smaller hotels where bathroom space can be limited — the hanging hook is genuinely practical.


    ✈️ The Long-Haul Flight: What Actually Helped

    The transatlantic flight to Scotland is long, and I was glad I came prepared. Here’s what made a real difference:

    Bose QuietComfort Earbuds

    Worth every penny. Active noise cancellation on a long overnight flight is genuinely life-changing — the engine drone alone is exhausting over 8+ hours. These are the Bose QuietComfort Earbuds and they’re what I reached for from the moment I sat down. IPX4 water resistance, USB-C charging, and up to 8.5 hours of playtime. They were on my ears for most of the flight.

    Sleep Mask + Head Pillow

    The Albatross Sleep Eye Mask blocked light completely — it’s designed for side sleepers and doesn’t press on your eyes, which matters when you’re trying to rest in a seat. The SARISUN Airplane Head Strap Travel Pillow actually kept my head from dropping forward, which is what kills me on overnight flights. Blanket from TJ Maxx, because the airline ones are never enough.

    Compression Socks

    Wearing COOLOVER Copper Compression Socks on every flight over three hours is now non-negotiable for me. Your legs will thank you. I arrived in Scotland less puffy and more rested than on previous long flights where I skipped them.

    Motion Sickness + Jet Lag Kit

    Bonine for motion sickness (non-drowsy, works for flights, ferries, and winding Highland roads). Boiron Jet Lag Relief Kit for the time shift. Allclair Nausea Inhaler for any queasiness without needing to swallow anything. Chimes Ginger Chews as a natural backup that also just tastes good on a plane.

    Medication + Tech Organizer

    The MyTagAlongs Cloud Rectangle Double Detachable kept everything I needed during the flight — earbuds case, meds, passport, lip balm, charging cable — in one accessible place. Find it at Ulta or Nordstrom Rack.


    What I’d Do Differently

    • Slow down and do a little less. Honestly — I was so excited about everything that I packed a lot into this trip, and I loved every single stop. But if you’re visiting Scotland for the first time, I’d recommend picking fewer destinations and giving yourself more time at each one. A lot of the Highland day is genuinely beautiful driving, but it adds up. Consider building in a slower Edinburgh day between tours so you can actually absorb what you’re seeing instead of going from cab to attraction to cab.
    • Pack a proper rain jacket from day one. Don’t assume you can get away without one. You can’t.
    • Book Edinburgh Tour Guides early. Availability fills up, especially in summer. Book before you go.
    • Plan for weather changes within a single day. Layers aren’t optional in Scotland — they’re how you stay comfortable when the weather shifts mid-afternoon.
    • Give yourself at least 4-5 days. Three day trips plus Edinburgh exploring is genuinely the minimum to feel like you’ve seen it. More is better.
    • Bring good walking shoes with cobblestone grip. The right sole makes a meaningful difference on wet stone streets.

    Scotland Gear Quick Reference


    Read Next

    As an Amazon Associate, I earn from qualifying purchases. See my full Affiliate Disclosure for details.